

This is in continuation of previous article How to use Ele HelloEle.com
Sharing your documents remotely with your fellow team members? Then say hello to ele. No sharing of lengthy URLs or the hustle of logins. This simple easy-to-use file sharing tool solves it all.
This tutorial focuses on using ele with BackBlaze Cloud Storage, configuration is same for any other S3 comptable cloud storage system.
- Create an account in BackBlaze.
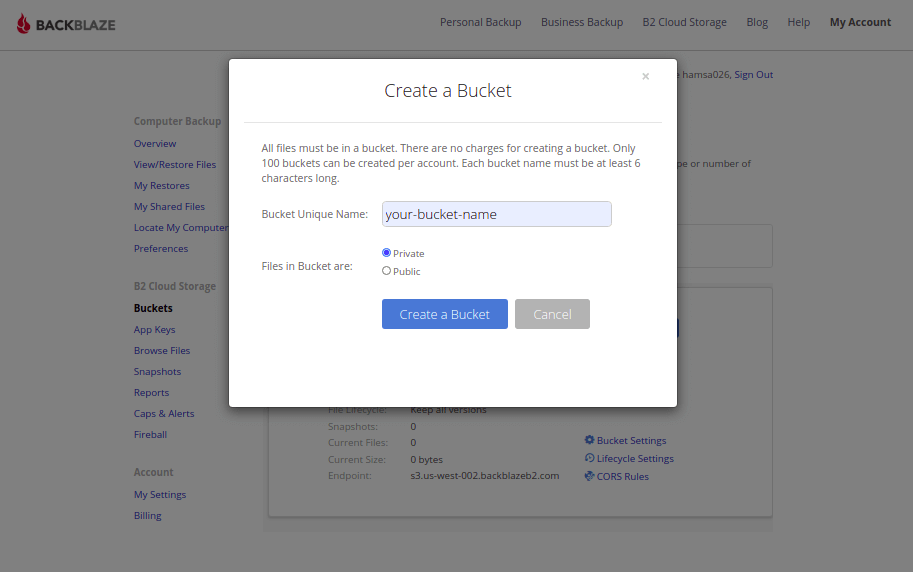
Create a bucket as shown below.
- Go to Buckets tab under B2 Cloud Storage.
- Select Create a bucket option.
- Enter a name for the bucket you are creating.
Create secret key for your bucket.
- Head to the App Keys page
- Click on Add a New Application Key button.
- A pop-up appears, enter any key name for your bucket.(Note: This key name will not be used for ele)
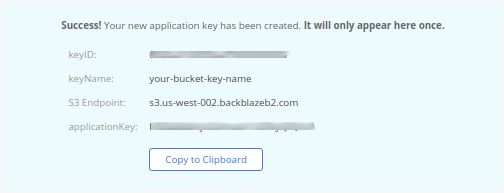 Once the key is created, make sure you copy the Key ID and Application Key listed in the blue box.
Install ele using the below command in the terminal.
$ npm install -g helloeleCreate group using the command,
$ ele create-groupThe create-group command prompts for few inputs:
- Type of Storage - choose Back Blaze.
- s3 access key - keyID in the above image
- s3 secret access key - applicationKey in the above image
- s3 bucket name - your bucket that you created in BackBlaze
- group name - group name of your choice
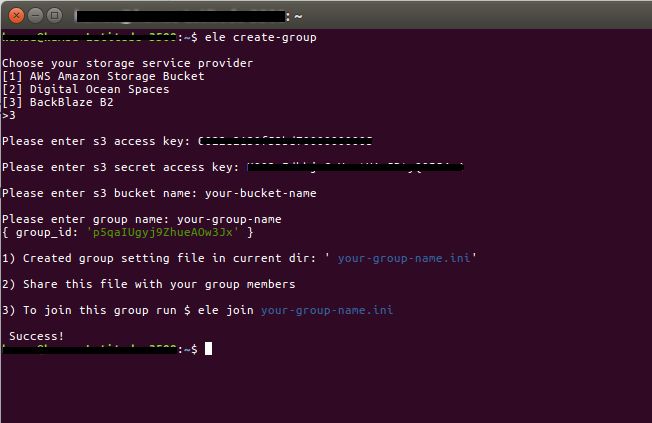
Once the group is created, share your-group-name.ini file to your group members by email or other means.
The other group members can join this group by using the command,
$ ele join <your-group-name>Now to upload a file in this group run
$ ele upload <file-to-be-uploaded>This returns a file-number on the successful upload which can be shared to your team members off-wire.
To download that file run
$ ele download <file_number>To delete the file from group
$ ele delete <file_number>